Overview
Brandboom allows both buyers and sellers to create Returns and Credit Notes. These are also referred to as Return Authorizations (RAs). This feature enables you to manage refunds via integrated services like PayPal or Stripe, or issue credits for future purchases within the platform.
How-to
Start a Return
To start a return, first:
1. Invoice must be created and sent to the buyer
2. Go to your Showroom's Order Settings and select "Allow buyers to initiate a return request".
3. Invoice should be marked as Shipped.
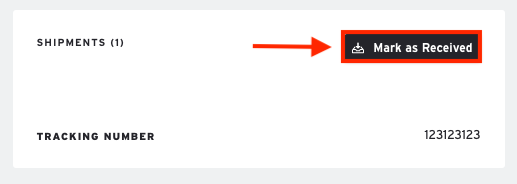
4. Buyer must mark invoice as Received.
Once you're ready to start the return:
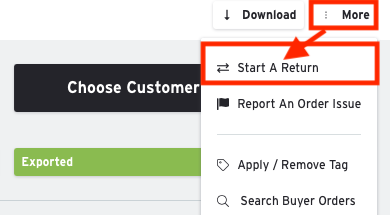
- Select 'More' at the top right corner of the invoice. Then Select 'Start A Return' or 'Report an Order Issue'
- Next, fill out the Return or Issue Form.
- Add your ship to & from addresses
- Select the SKUs and quantities to be returned.
- Select the reason from the dropdown menu.
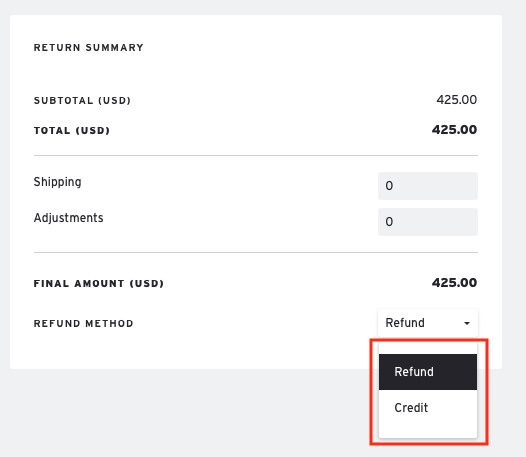
- At the bottom of the form, add any additional shipping or adjustment costs.
- Select the refund method. Credit notes will be explained in the second half of the article.
- Select 'Approve'.
- ‘Edit Return’ or 'Edit Issue' is available once approved to make changes.
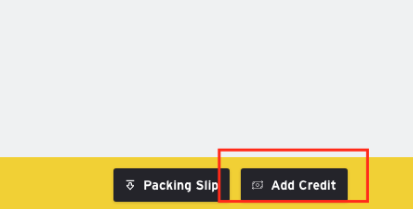
- For returns, you can download the packing slip by selecting Packing Slip at the bottom of the form.

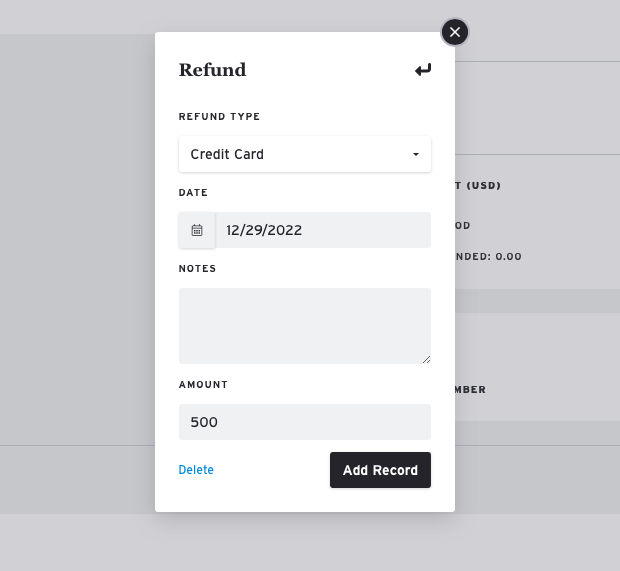
Add a Refund
Once the Refund has been approved, select 'Add Refund' at the bottom of the screen on the Return or Issue form.
If you have integrated with Stripe and the buyer paid via credit card, you can then refund via Stripe in Brandboom. If you have integrated with PayPal and the buyer paid via PayPal, you can then also refund via PayPal in Brandboom.
If you'd like to add a manual refund, select the 'Add Refund' button in the Refund modal.
Fill out the information below and select 'Add Record'.
Approve or Deny a Request
If a buyer submits a Return Request or Issue Report, you will receive an email notification with a link to the form.
After you review the request, select 'Approve' or 'Deny'.
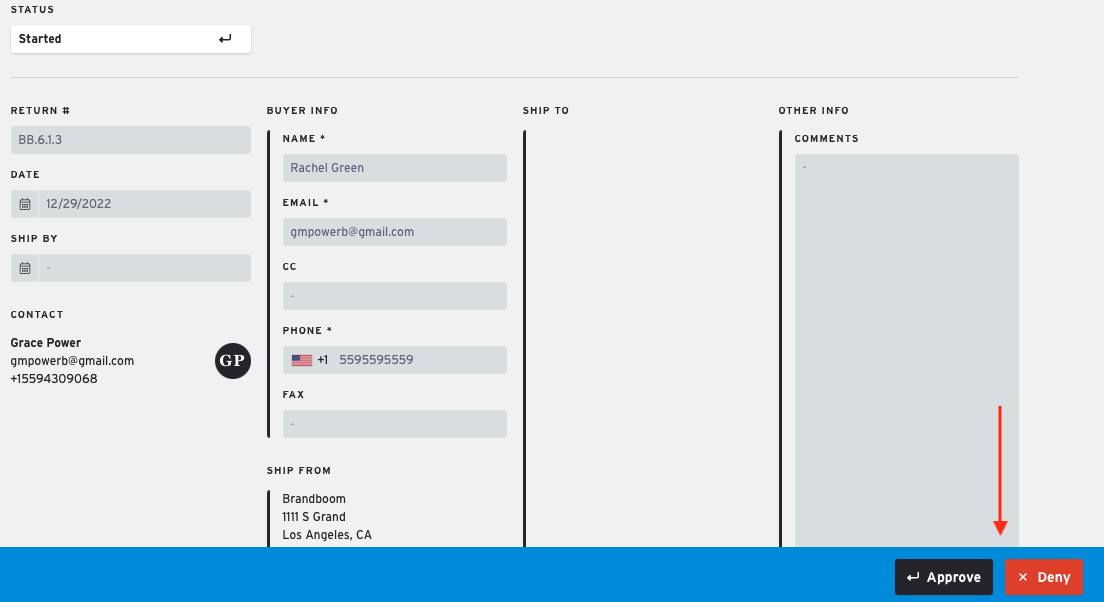
Approved:
- Once approved, you can select 'Edit Return' or 'Edit Issue' in the top right corner to make any changes.
- From there, the process to add a refund and download the packing slip is the same.
Denied:
- If you deny the return, you will be prompted to include the reason for denying.
- Select 'Confirm'.
- To re-open, select 'Reopen Return' or 'Reopen Issue' in the top right corner of the form.
- The buyer will be notified on the form and receive a notification email.
View Returns & Issues
Select the new tab on your order page titled 'Returns' to track and manage return or issue requests.

Credit Notes
When you choose the refund method, you have the option to choose 'Credit'.
A Credit Note can be applied to that buyer's future invoices. Once a credit is issued, only the seller can apply it to future invoices.
Add a Credit for Refund/Issue
Once you've selected 'Credit' as the refund method, select 'Add Credit'.
When prompted, fill in the amount you wish to credit. You can credit the entire refund amount or credit in increments by repeating these steps again.
Apply a Credit on a Future Order
I
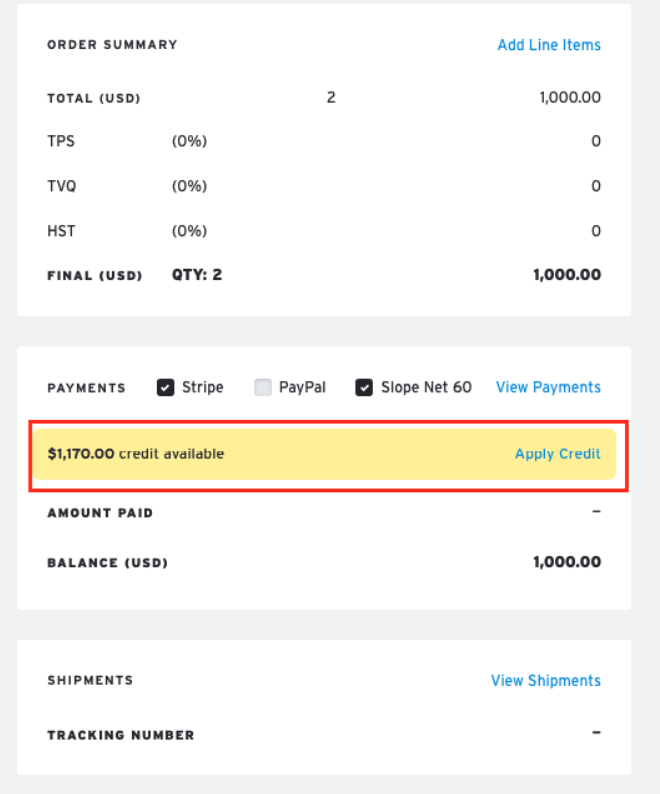
Click 'Apply Credit'. Select the amount you wish to apply.
f a buyer uses the same email for a future order, you can apply an available credit to their invoice.
On the invoice, there will be a section stating there are available credits for this buyer.

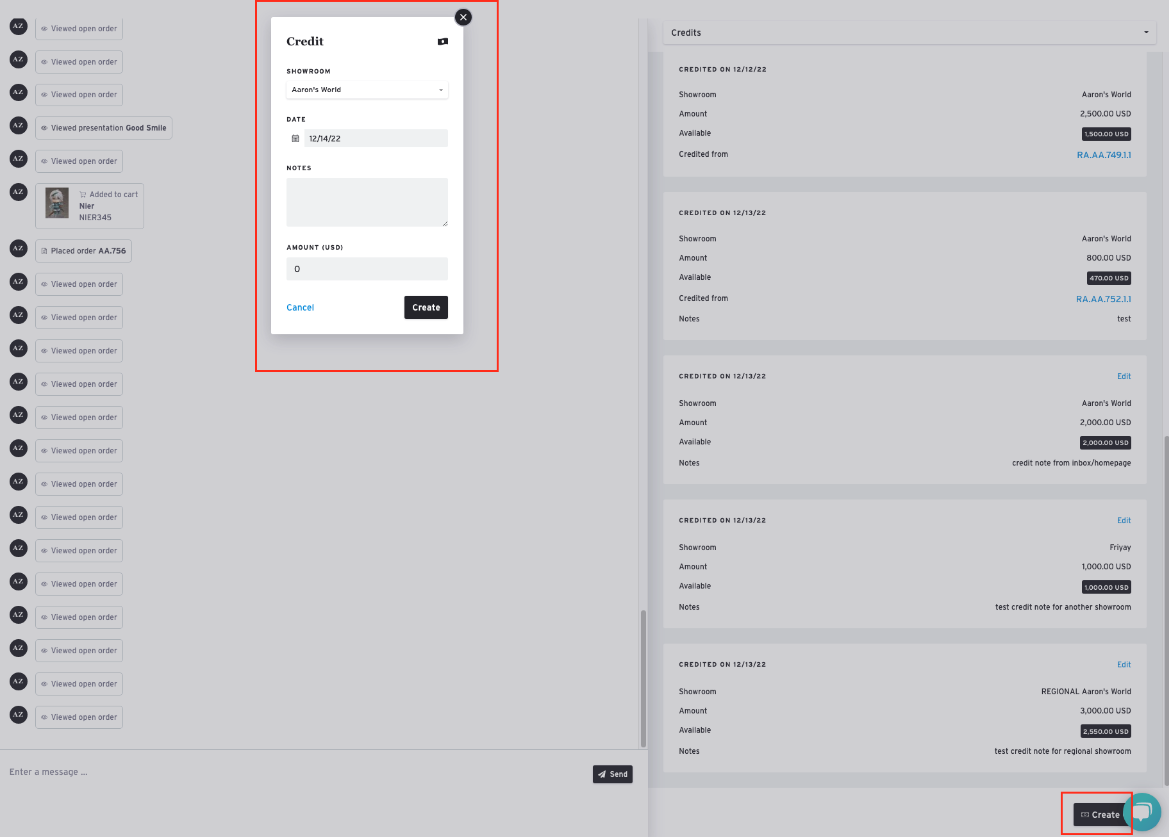
Review or Create new Credit Notes
Sellers can view all credit notes issued to a specific buyer in the Inbox Tab. Just select a buyer to view:
- The Return Authorization credits came from (if applicable)
- Amount credited to the buyer
- Remaining credit balance
To create a new credit separate from a return or issue, click 'Create' and fill out the amount.